
How to Set Up a Simple Email Automation in Airtable
This comes up so often in conversation, I had to record a quick tutorial! In Airtable (on their paid-for plans), you can easily send emails (to clients, to your team), based on specific triggers.
For example:
- Marketing content ready to schedule, send email to VA
- Client submits form, send copy of their responses to the client
- Enquiry form received, send different email replies depending on the type of enquiry they chose (e.g., speaking query gets one kind of response, interest in working together gets another).
This video walks you through the simple email automation process, step-by-step, in less than 4 minutes. Or, follow the step-by-step guide with images below.
This tutorial is based on sending an email to your VA when the status on a piece of marketing content changes to ‘VA – Ready to Draft‘ or ‘VA – Ready to Send or Schedule‘ (or words of your choosing!)
Here’s how you can set that up:
- This assumes you already have an Airtable account – if you’re new to Airtable, you can get your account here (affiliate link).
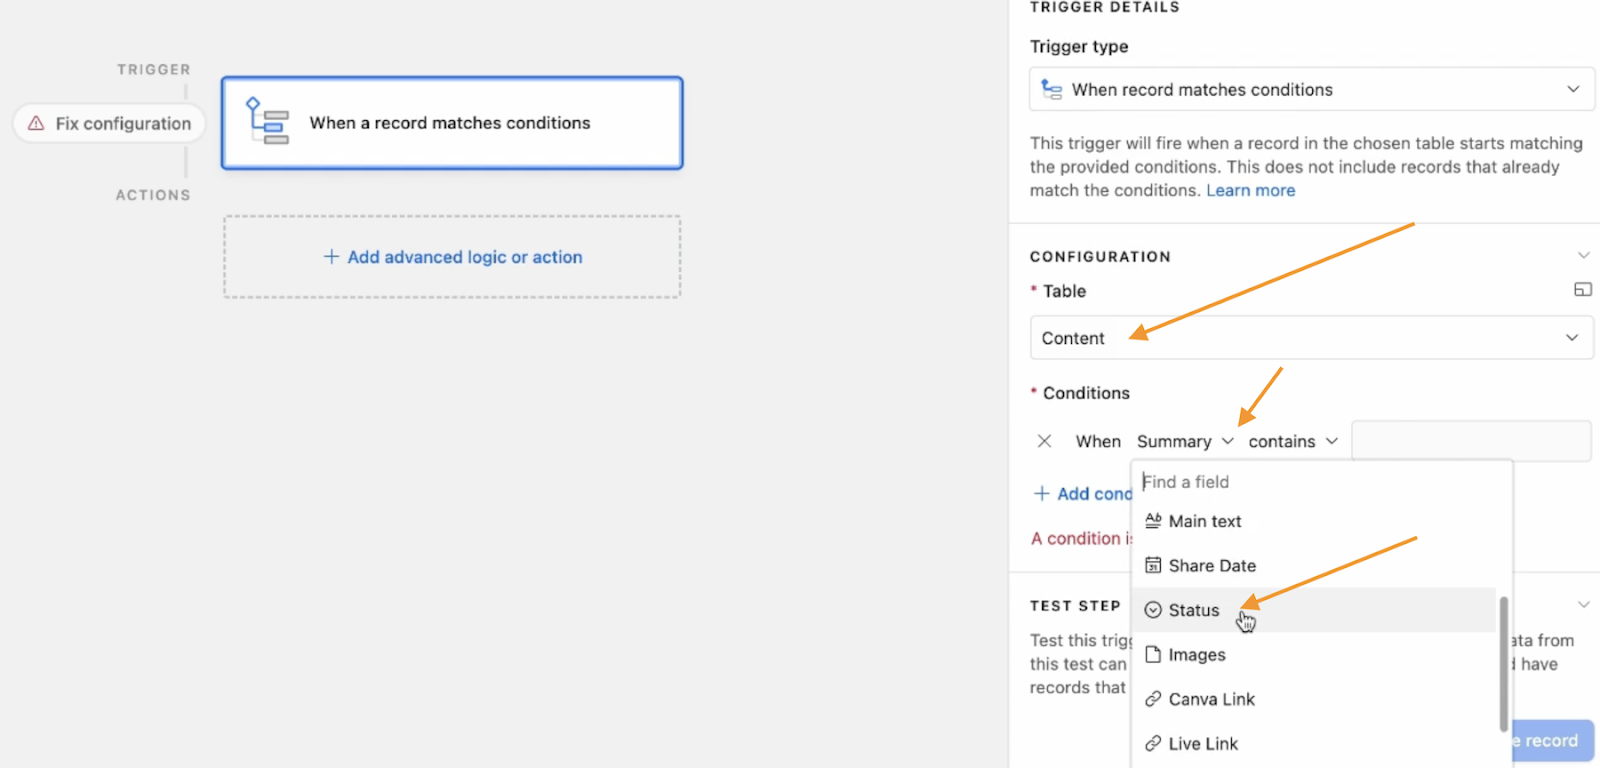
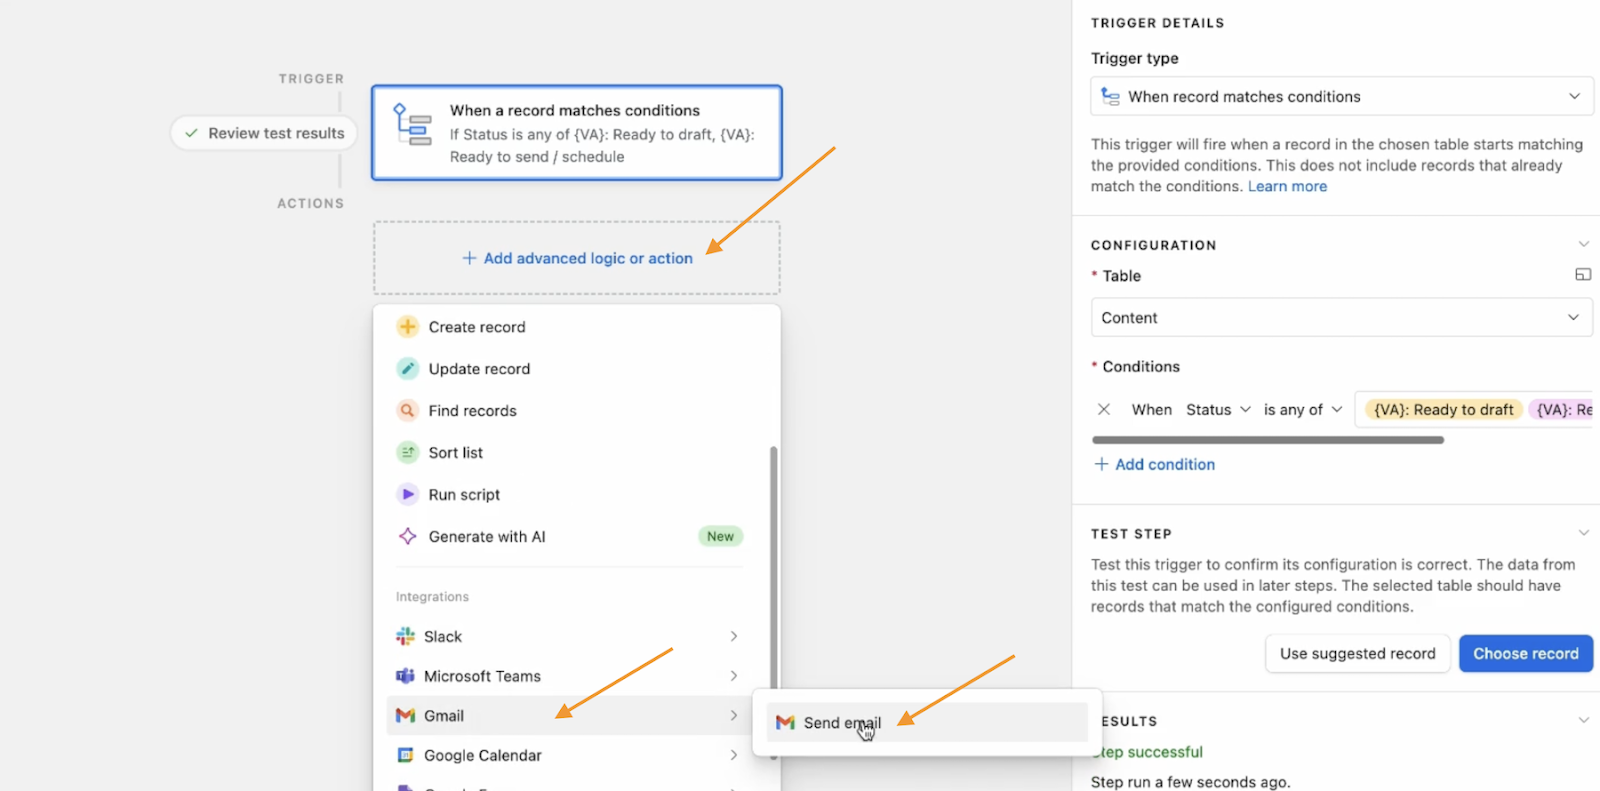
- Go to the base or hub that you’re working on. Click on ‘Automations’ in the top bar, then click the suggested trigger ‘When a record matches conditions’

- On the right-hand side you’ll set those conditions;
- Table: choose the table you’re using
- Conditions:
- When = in the drop down, select ‘Status’ (or the column you want to use)
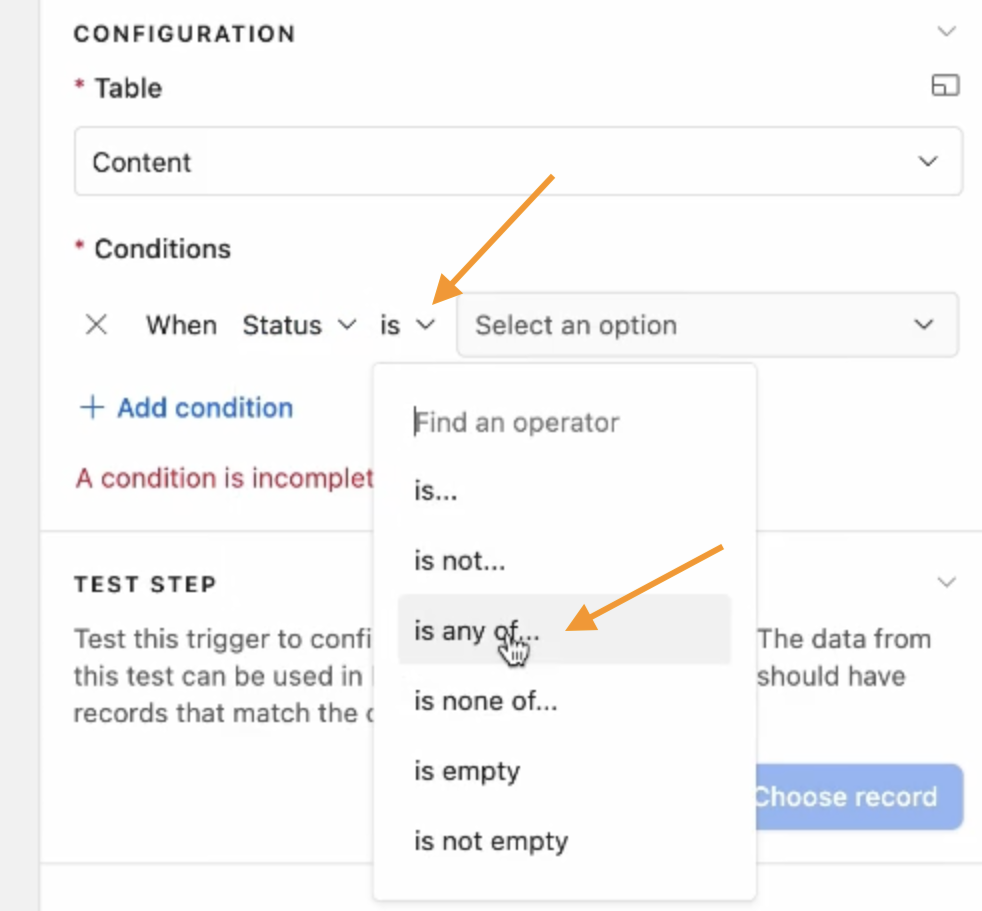
- Contains = change to ‘is any of’ (if there are multiple you want to select, or could be just ‘is’)
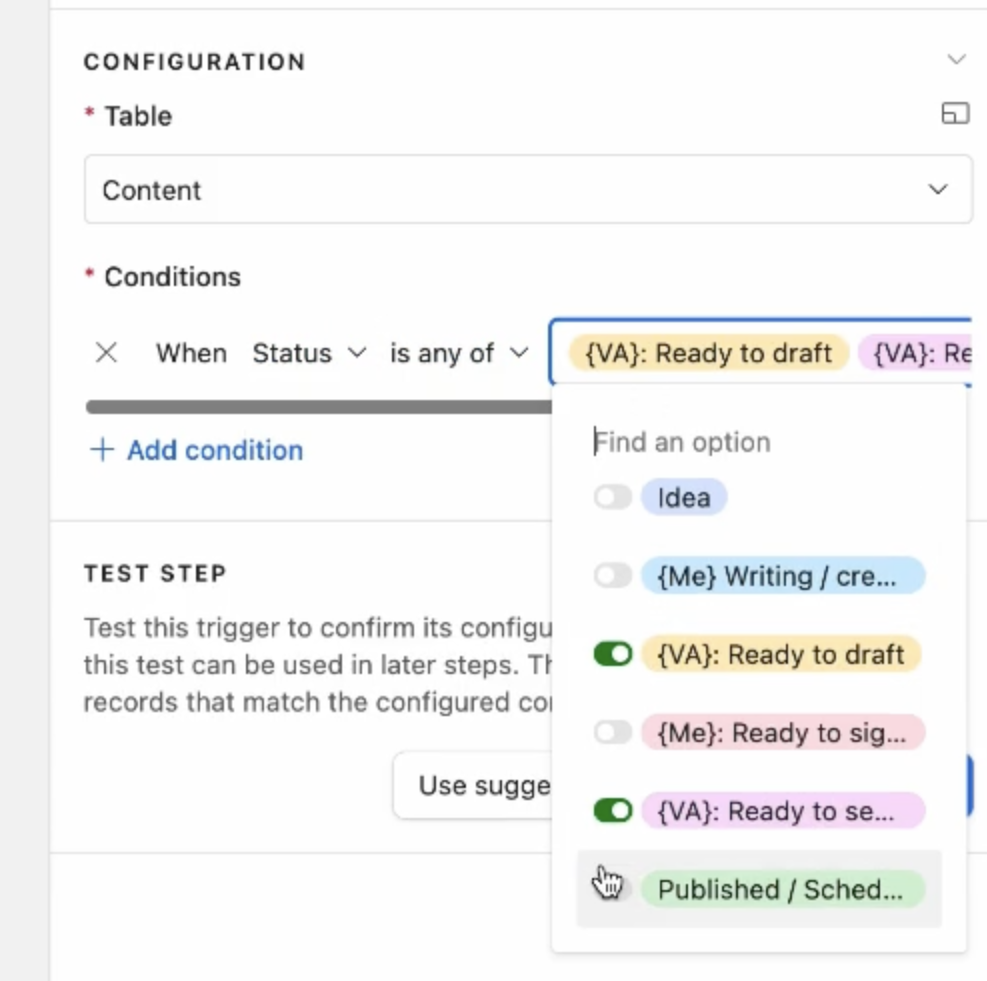
- Then select the status you want the automation to run on, e.g., ‘VA ready to draft’ and ‘VA read to send / schedule’
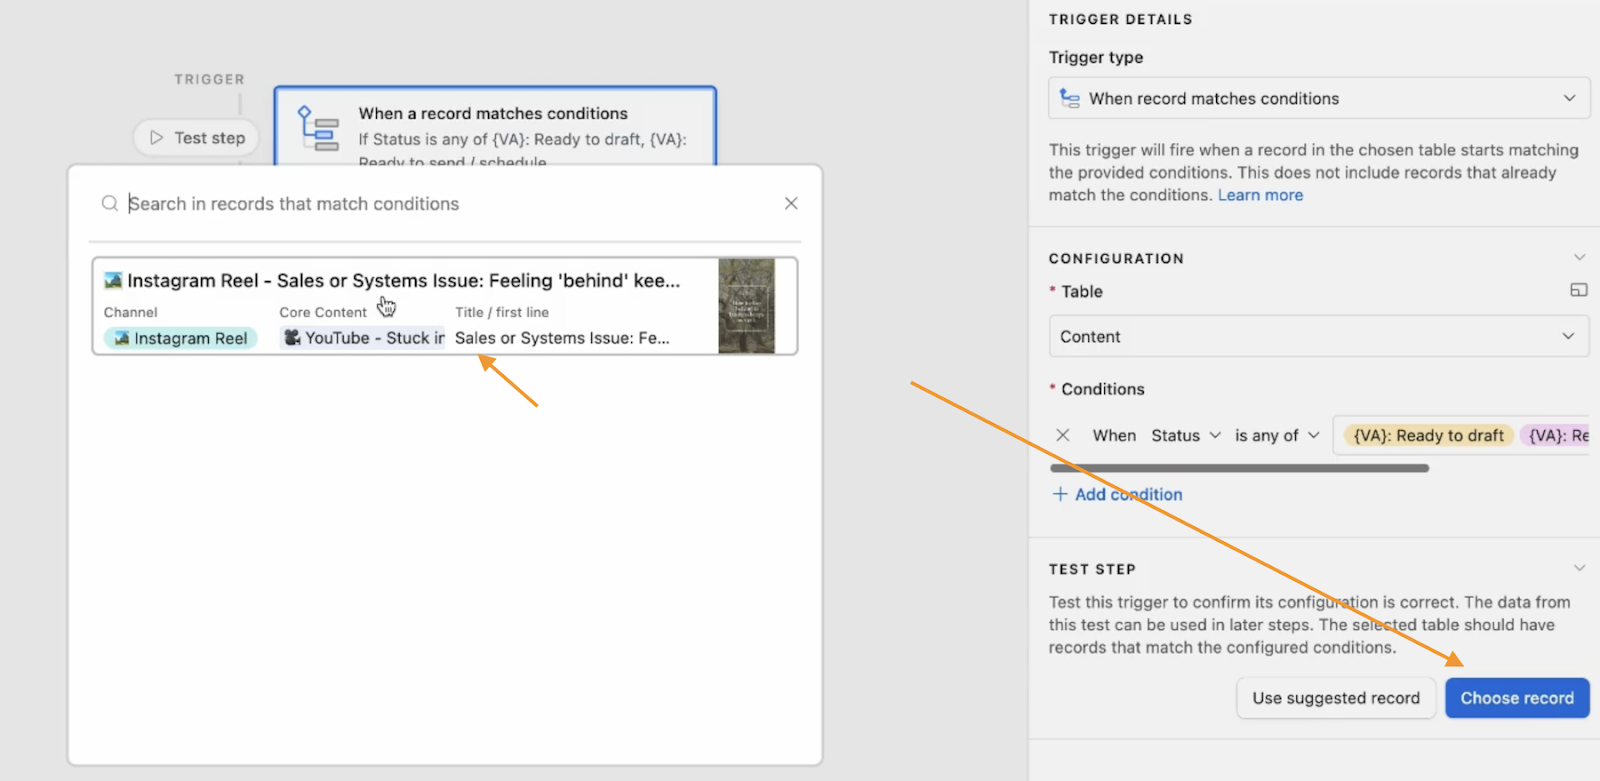
- To test the automation, Airtable will prompt you to choose a record. Click the ‘choose record’ button and select one.
- If none come up, go back into your Airtable table, change the status on one of the lines to the status you’re using (while you set up this automation), then you can change the status back after you’ve tested it.
- We have the trigger, now we want to set the action.
- Click on the ‘Add advanced logic or action’, and scroll down to ‘Gmail’ and ‘Send email’
- You could also sent a Slack message or Outlook email if you prefer. Note that if you choose to send an ‘Airtable email’ (higher up this list), you can only send a certain amount a day. This may be fine if it’s your best option, but something to be aware of.
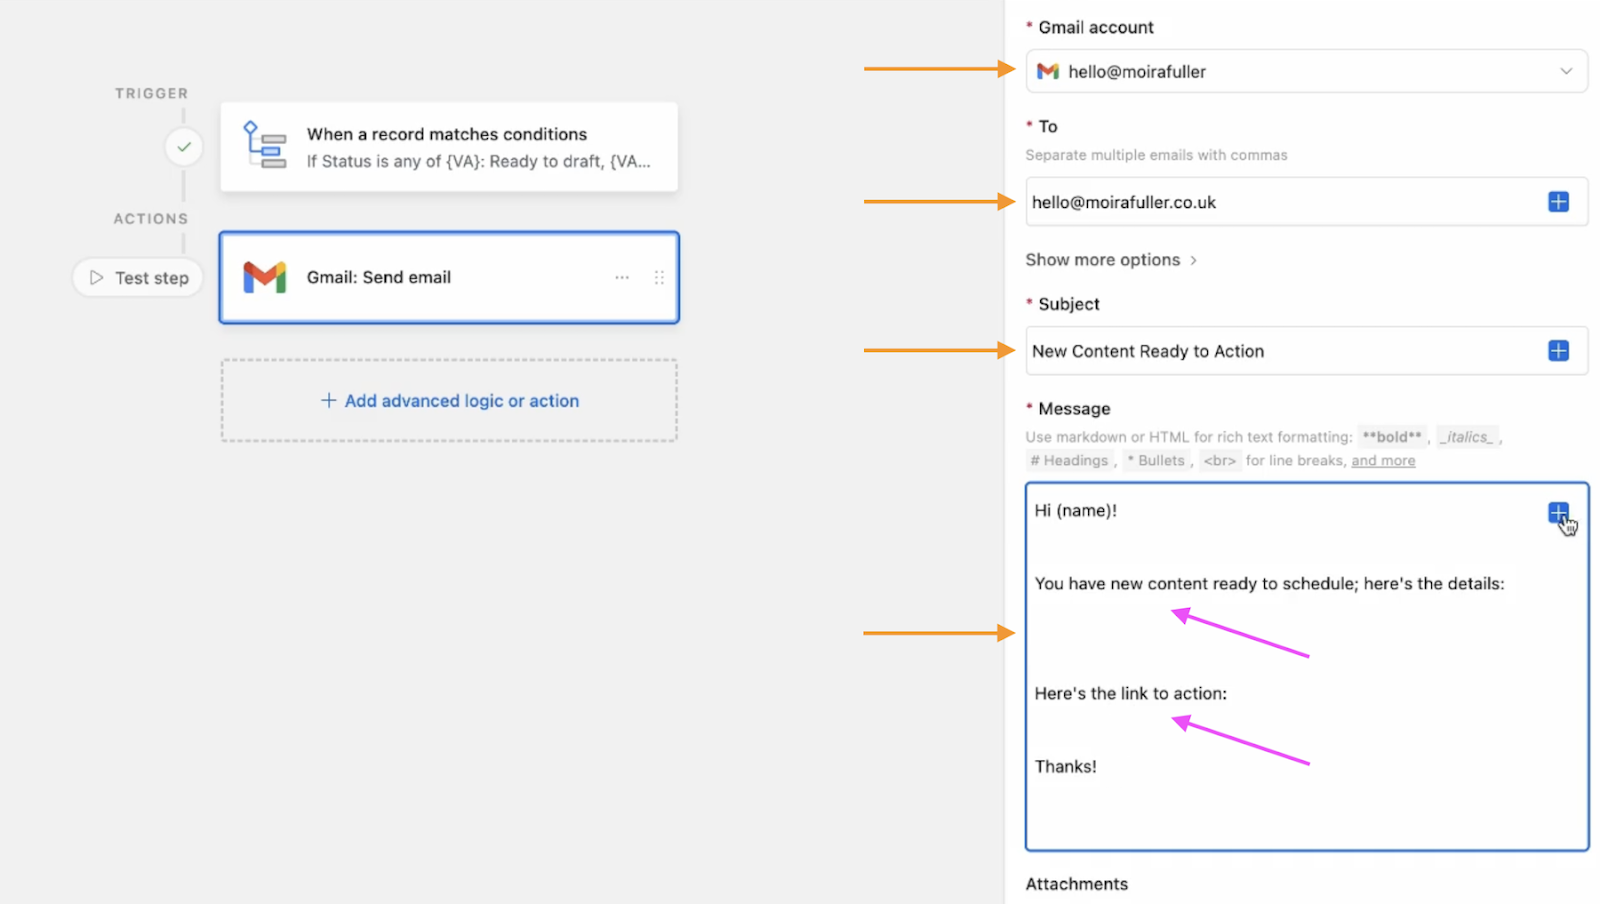
- In the right-hand section, choose your gmail account (you’ll need to connect it the first time)
- In ‘To’ enter the email address for your VA
- Subject: Add ‘New Content Ready to Action’ (or your preferred wording)
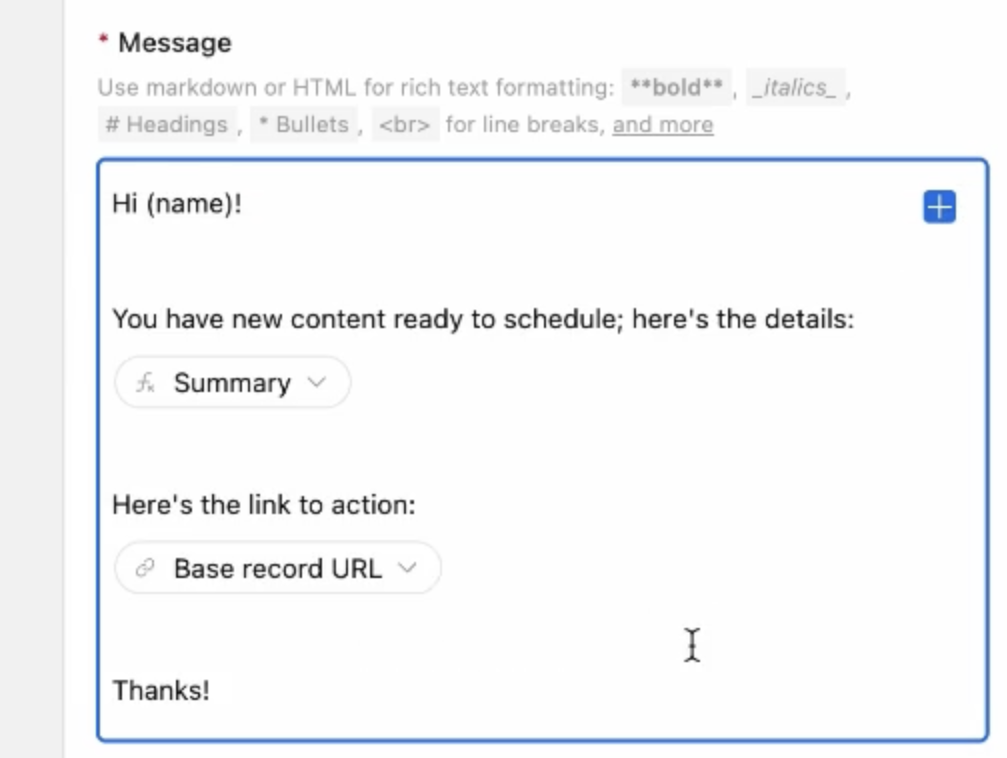
- Message: Start with the main text that will be the same in every email, and then we’ll add in ‘dynamic’ text in a second. E.g.,
Hi (name)!
You have new content ready to schedule; here’s the details:
Here’s the link to action:
Thanks!
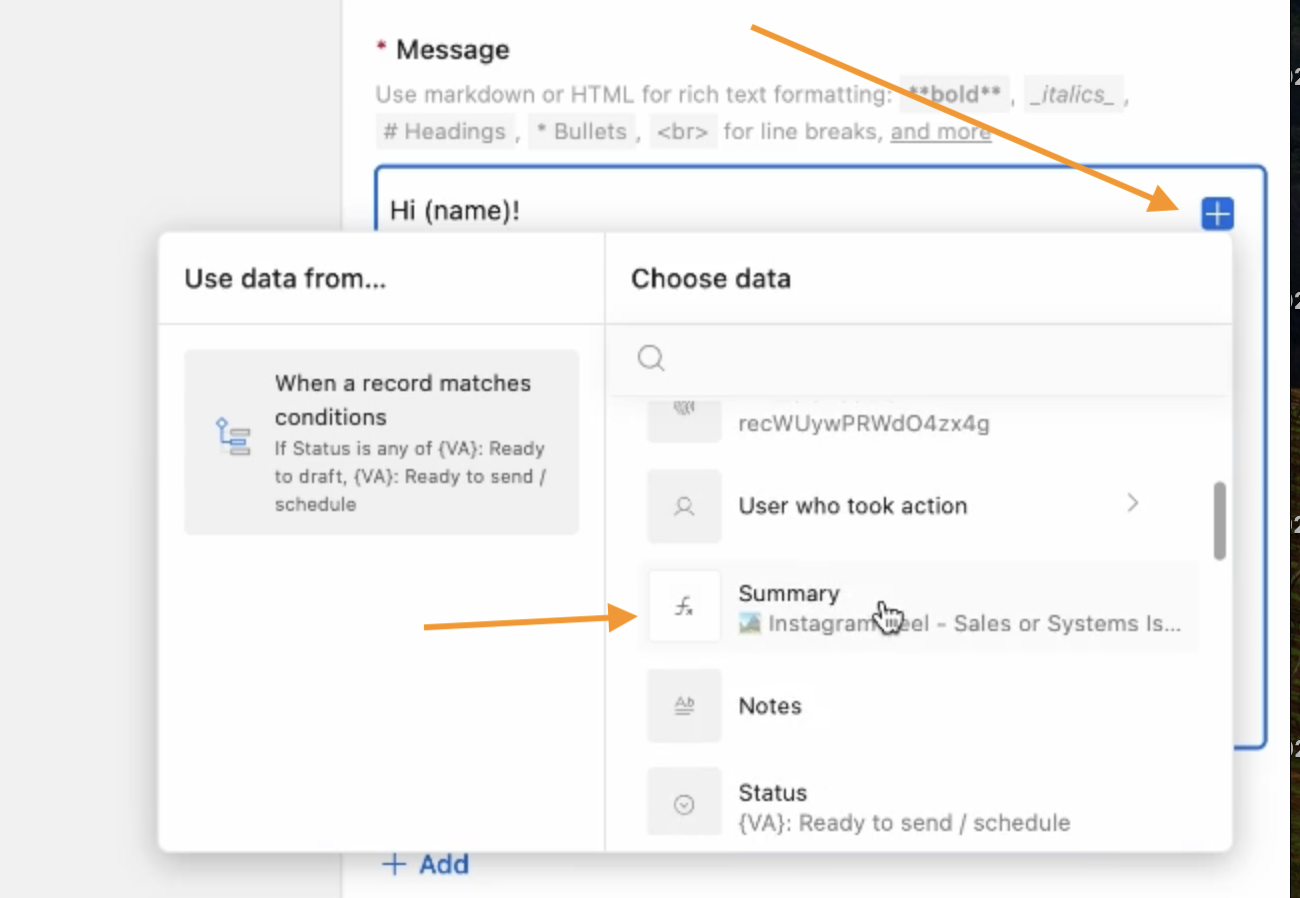
- Dynamic text will change with every email that’s sent (the magic of Airtable!)
- We’ll start with the summary details. In your message box, click under the ‘here’s the details’ text line, then click the blue box in the top-right corner.
- Choose the information you want to share – you can choose more than one thing (e.g., with a comma between them). Here we already have a summary, so we’ll select that.
- Note the text in grey underneath the heading is Airtable pulling through the text from the sample record you selected in the first step.
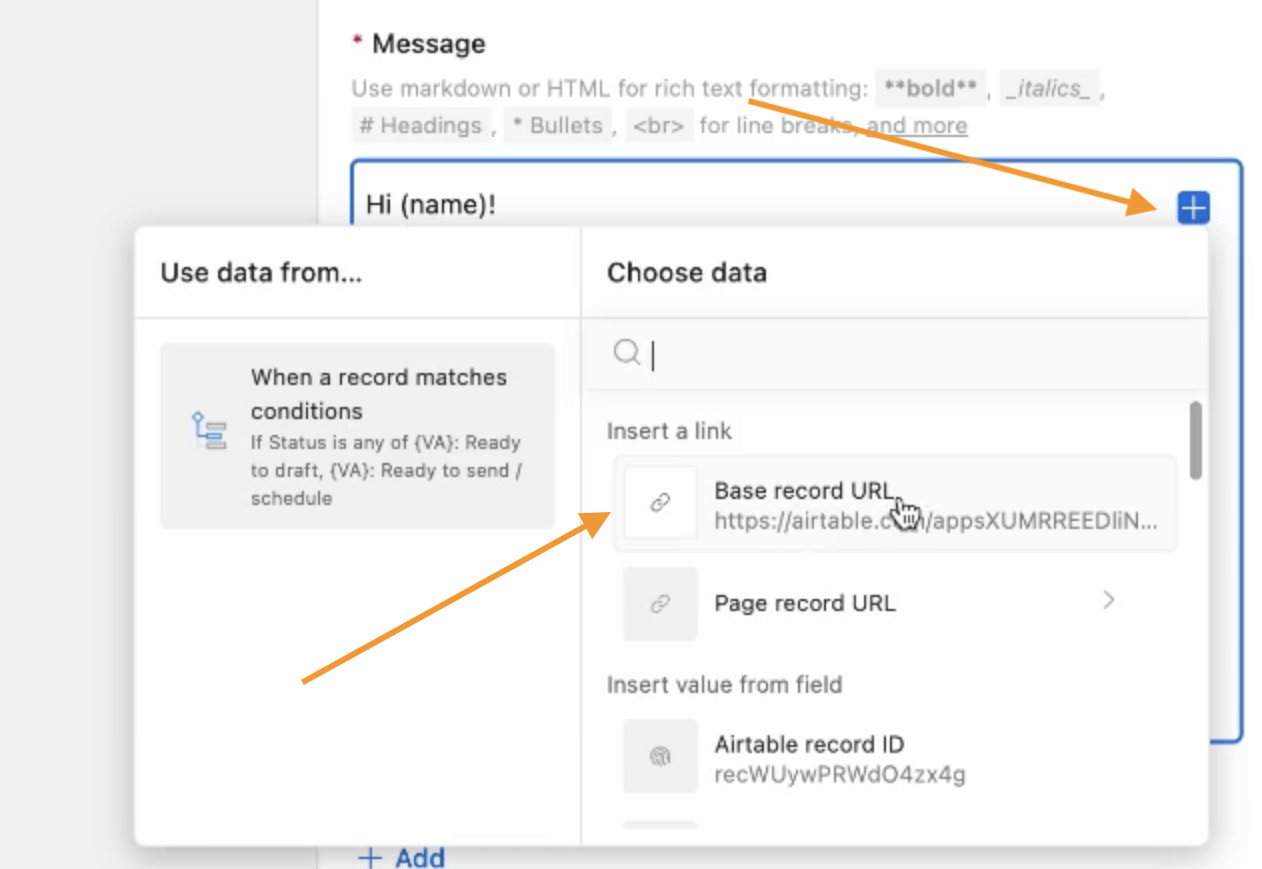
- Do the same for space beneath ‘here’s the link to action’; click under that line, then click the blue box in the top-right corner and select ‘Base record URL’; this will link directly to that specific record.
- When you’ve done that, your message will look like this.
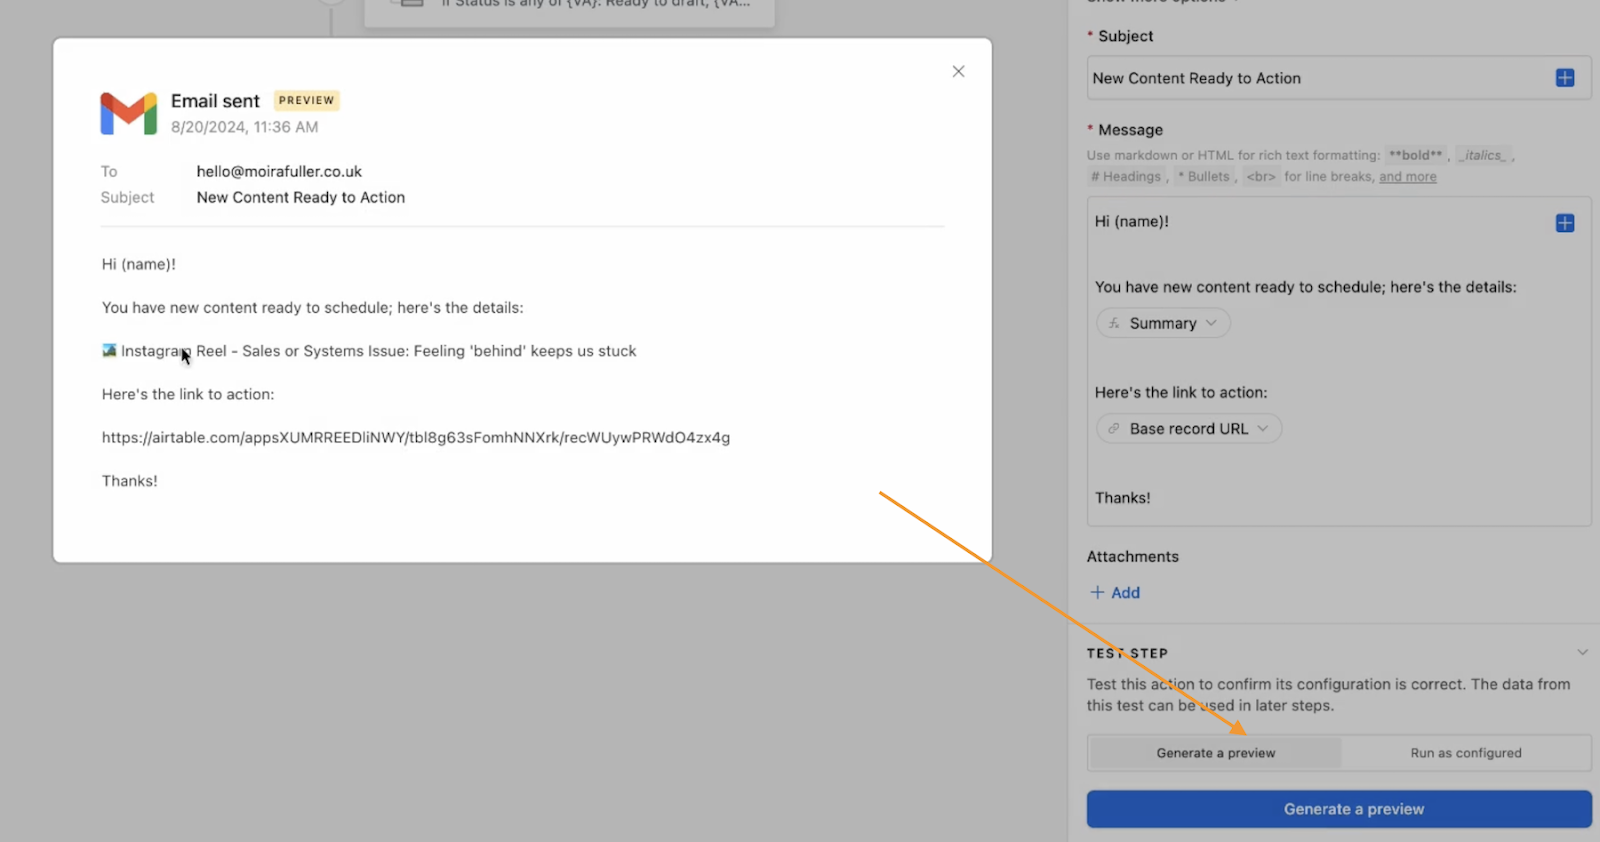
- Now click the ‘Generate a preview’ button, and you’ll see what your email will look like.
- You can also ‘run as configured’ and see the email come into your VA inbox (if it’s one you share, or change the to: email address just for testing to your own, then swap back to your VA’s email)
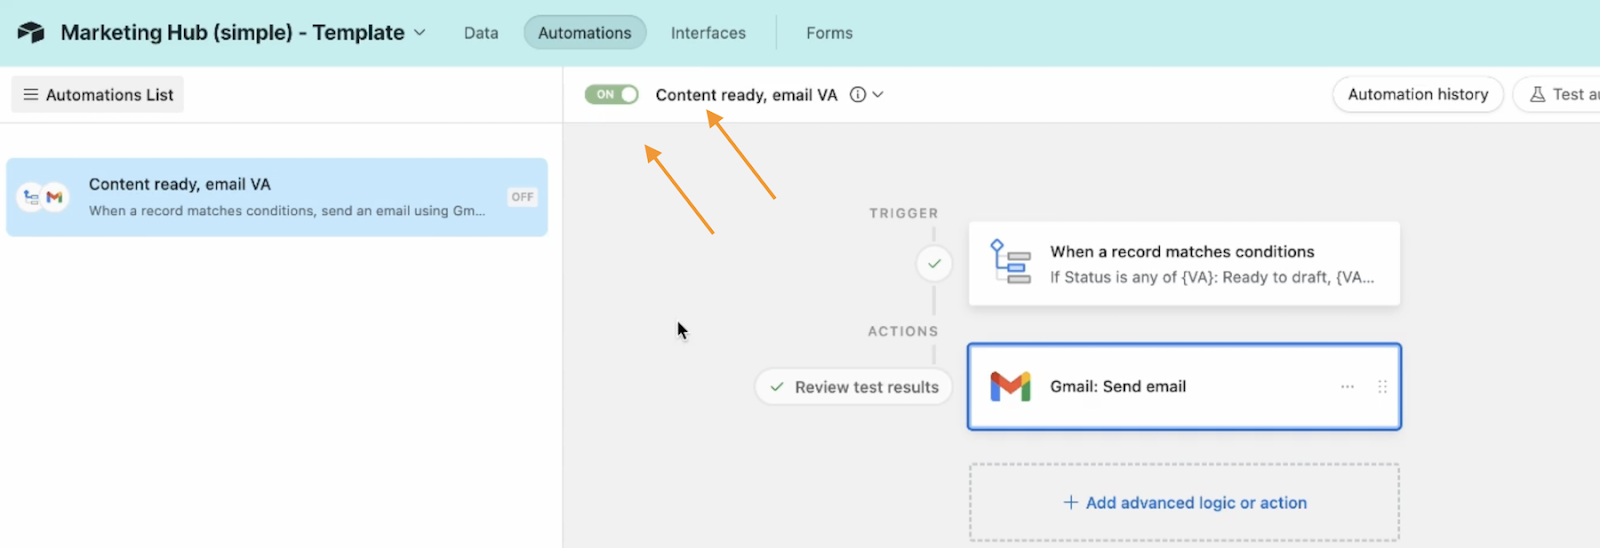
- Finally, rename the automation, e.g., ‘Content ready, email VA’ and toggle the automation ‘ON’.
I hope you’ve found this useful!

